Hey!! Colleagues, we are back again with a new article of tutorial CSS3 Tutorials. Here, we will start from where we left in the previous post. In this, we are going to cover the Advanced part of the CSS3 Tutorial. The advanced feature is a little long, which will take two more articles.
If you missed the previous post of CSS3, then check once CSS3 Tutorials 104.
What’s inside in this article:
CSS Visual Formatting
The CSS visual formatting design is an algorithm that prepares and transforms each element of the document to make one or more boxes that conform to the CSS Box Model.
CSS Box Generation of processed elements −
Block-level Elements and Block Boxes
The Block-level elements of CSS3 are elements that are formatted visually like blocks with a line break before and after the element.
For example:
Divisions (<div>), Heading (<h1> to <h6>), etc.
Inline-level Elements and Inline Boxes
The Inline-level elements are those elements of the source document that do not form new blocks of content;
For example: Spans (<span>), Strong element (<strong>)
The Inline elements commonly may only contain text and other inline elements.
CSS Display
The display property is the essential property of CSS for controlling layout.
CSS Display Property
The Display property of CSS defines how the components(div, hyperlink, heading, etc.) are going to be placed on the web page.
Syntax:
display: value;Changing the Default Display Value
The default display value of an element is an essential implication of the display property.
Display Block
The display block always begins on the new line. It holds-up the entire available width (stretches out towards left and right as much as these elements can). A display block element is a <div> element.
Some example of display block elements are as below:
<div> ,<form>, <section>, <footer> and so onDisplay Inline
This property of CSS is the default property of anchor tags. It is used to place the div inline, i.e., in a horizontal manner. The inline display property ignores the height and the width set by the user.
The <p> and <li> elements are inline-level elements:
<!DOCTYPE html>
<html>
<head>
<title>CSS Display property</title>
<style>
#main{
height: 200px;
width: 200px;
background: teal;
display: inline;
}
#main1{
height: 200px;
width: 200px;
background: cyan;
display: inline;
}
#main2{
height: 200px;
width: 200px;
background: green;
display: inline;
}
.blog {
margin-left:20px;
font-size:42px;
font-weight:bold;
color:blue;
}
.tech {
font-size:25px;
margin-left:30px;
color: aqua;
}
.main {
margin:50px;
}
</style>
</head>
<body>
<div class = "blog">technicalblog</div>
<div class = "tech">display: inline; property</div>
<div class = "main">
<div id="main"> BLOCK 1 </div>
<div id="main1"> BLOCK 2</div>
<div id="main2">BLOCK 3 </div>
</div>
</body>
</html> Display Inline Block
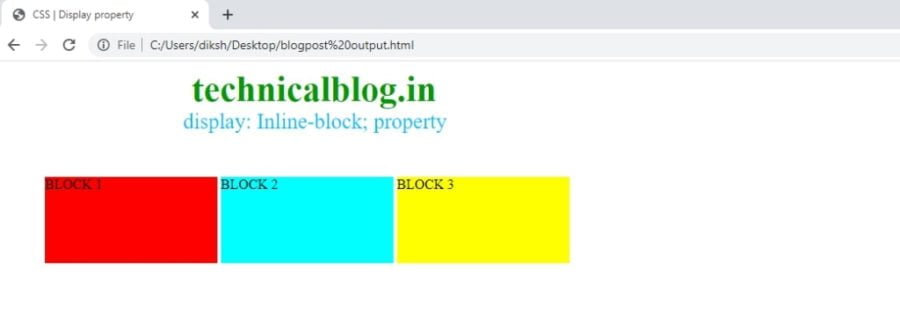
This is an inherited property of Inline and block property means. This feature uses both properties mentioned above, block and inline.
Examples of inline elements:
- <span>
- <a>
- <img>
<!DOCTYPE html>
<html>
<head>
<title>CSS | Display property</title>
<style>
#main{
height: 100px;
width: 200px;
background: red;
display: inline-block;
}
#main1{
height: 100px;
width: 200px;
background: cyan;
display: inline-block;
}
#main2{
height: 100px;
width: 200px;
background: yellow;
display: inline-block;
}
.gfg {
margin-left:220px;
font-size:42px;
font-weight:bold;
color:#009900;
}
.blog {
font-size:25px;
margin-left:210px;
color: deepskyblue;
}
.main {
margin:50px;
}
</style>
</head>
<body>
<div class = "gfg">technicalblog.in</div>
<div class = "blog">display: Inline-block; property</div>
<div class = "main">
<div id="main"> BLOCK 1 </div>
<div id="main1"> BLOCK 2</div>
<div id="main2">BLOCK 3 </div>
</div>
</body>
</html> 
Display: none;
display: none; uses in JavaScript to hide and show elements without deleting and recreating them.
The <script> element uses display: none; as default.
CSS Visibility
A property called visibility allows us to hide an element from view. We can use this CSS visibility property along with JavaScript to create a very complex menu and very complex webpage layouts.
| Sr.No. | Value & Description |
| 1 | Visible This property is used to the box, and its contents are shown to the user. |
| 2 | Hidden By using the box and its content are made invisible, although they still affect the layout of the page. |
| 3 | Collapse It is for use only with dynamic table columns and row effects. |
CSS Position
The position Property
This property defines the type of positioning method uses for an element.
There are five different position values:
StaticRelativeFixedAbsoluteSticky
Static Positioning
HTML elements are by default in a static position.
The statically positioned elements are not affected by the top, bottom, left, and right properties.
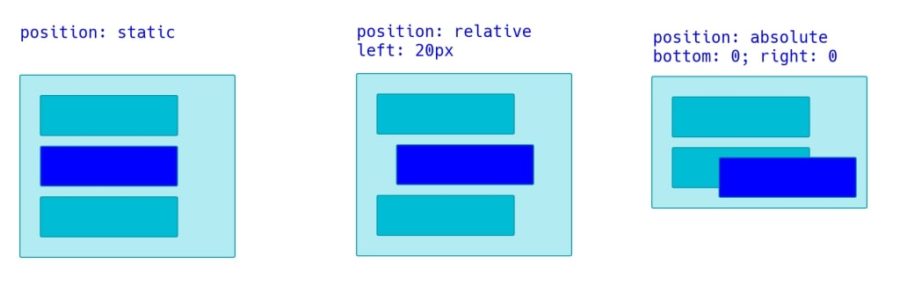
The position of any element which is static is not to stay in any particular way. It is always get positioned according to the normal flow of the page:
This <div> element has position: static;
For example:
div.static {
  position: static;
  border: 4px solid #73AD21;
}
Relative Positioning
A relative positioned element positions relative to its normal position.
In the related positioning scheme, the element’s box position is measured according to the normal flow. The box is then shifted from this normal position according to the properties — top or bottom and left or right.
.box { position: relative; left: 100px; }
Absolute Positioning
An element with position: absolute; is located relative to the most next positioned ancestor (instead of positioned relative to the viewport, like fixed).
For example:
.box { position: absolute; top: 300px; left: 100px; }Fixed Positioning

CSS Fixed positioning property is a subcategory of absolute positioning.
The only difference from other property is, the fixed position is fixed concerning the browser’s viewport, and it does not move when the page is scrolled.
Example:
div { position: fixed; top: 10px; left: 15px; }CSS Layers
The CSS Elements, which moves outside of the normal flow of the document, can be caused to overlap other elements. To determine which of these positioned elements should be on top and which should be on the bottom, the z-index property is used.
The z-index property uses along with the CSS position property to create an effect of layers. We can designate which element should come on top and which part should come at the bottom.
A z-index property can help us to create more complex webpage layouts. The following is an example that shows how to create layers in CSS.
<html>
<head> technicalblog.in
</head>

<body>
<div style = "background-color:red;
width:300px;
height:100px;
position:relative;
top:10px;
left:80px;
z-index:2">
</div>
<div style = "background-color:yellow;
width:300px;
height:100px;
position:relative;
top:-60px;
left:35px;
z-index:1;">
</div>
<div style = "background-color:blue;
width:300px;
height:100px;
position:relative;
top:-220px;
left:120px;
z-index:3;">
</div>
</body>
</html> 
CSS Float
The float property in CSS uses for positioning and layout on web pages.
The CSS clear property defines what elements can float beside the cleared element and on which side.
Float Property

The float property uses for positioning and formatting content, e.g., let an image float left to the text in a container.
It can have one of the following mentioned values:
- Left – An element floats to the left of its container
- right – An element floats to the right of its container
- none – The element does not float. This is the default value.
- Inherit – inherits the float value of its parent.
In its simplest use, the float property uses to wrap text around images.
How Elements Float
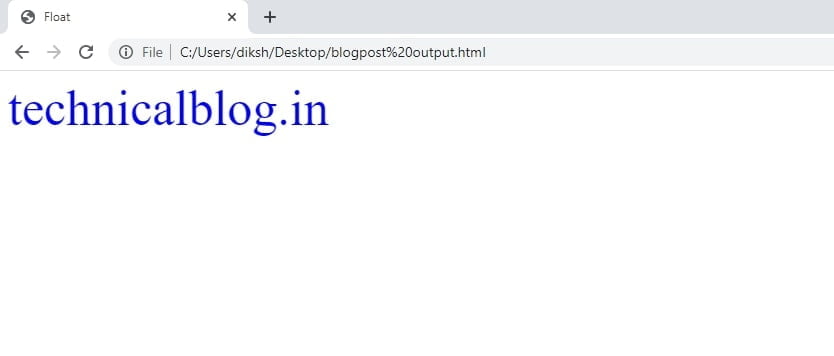
The float property of CSS places an element on the right or left side of its container; it is allowing text and inline elements to wrap around it horizontally, which means that an element can only be floated right or left, not up or down.
For example:
<!DOCTYPE html>
<html>
<head>
<title>Float</title>
</head>
<body>
<div class = "GFG" style = "font-size:50px;
color: blue; float:left;">
technicalblog.in
</div>
</body>
</html>
Turning off Float Using Clear Property
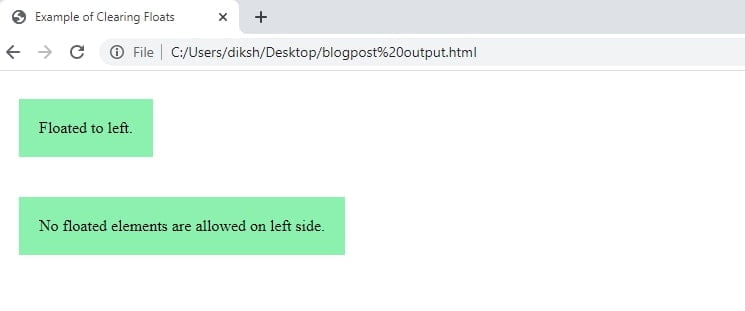
Elements that come after the floating element will flow around it. The clear property specifies which sides of an element’s box other floating elements are not allowed.
Now you know how to get an element to float, it’s important to know how to turn off the float. We can off the float property by using the clear property. You can clear left floats, right floats, or both.
For example:
<!DOCTYPE html>
<html lang="en">
<head>
<meta charset="utf-8">
<title>Example of Clearing Floats</title>
<style>
.clear {
clear: left;
}
p {
float: left;
margin: 20px;
padding: 20px;
background: #8cf0af;
}
</style>
</head>
<body>
<p>Floated to left.</p>
<p class="clear">No floated elements are allowed on left side.</p>
</body>
</html> 
FAQS:
What is the CLASS selector?
The class selector is a “stand-alone” class to which a specific style is declared. By using this CLASS attribute, the declared style can then be associated with any HTML element.
syntax of using class in CSS:
.class name{ property: value;}
What is the ID selector?
The CSS id selector has used the id attribute of an HTML element to selecting a particular element.
The id of an element is always a unique one within a page, so it is obvious that an id selector is used to select one unique element!
Can we attach more than one declaration to a selector?
Yes. It can be possible. If we declare more than one declaration to a selector, we should be separated by a semicolon. e.g.:
Selector {declaration1; declaration2}
P {background: blue; color: black}
css3 tutorial, css3 tutorial, css3 tutorial