Howdy friends. Welcome to our this article. How to stop auto-update in windows 10. Some times it happens that we bought a new system and don’t know much about the computer and faces many issues. It is one of them which I have personally experienced the auto-update issue. It consumed my data very fast within 15 minutes. I checked everywhere, but I am not able to found it because I was not familiar with the laptop. It was totally new to me. You guys are thinking why I’m telling this to you because if I don’t share or talk, then you cant relate to yourself.
OK, leave this chit chat, now I am coming to the topic. In this article, we will discuss how to stop auto-update in windows 10 with a screenshot step by step.
Step -1:
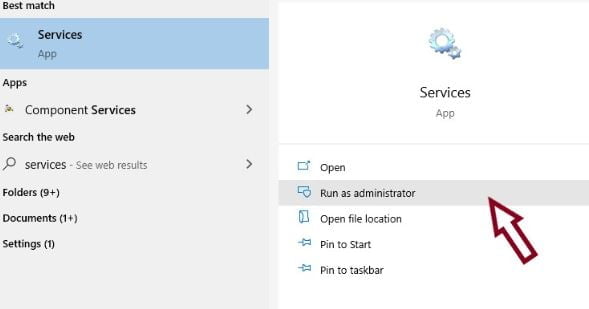
In the first step, we have to open the Start menu and type Services, and then we can clearly see that on the right side, few options are showing. Then click on 2nd option, Run as administrator.
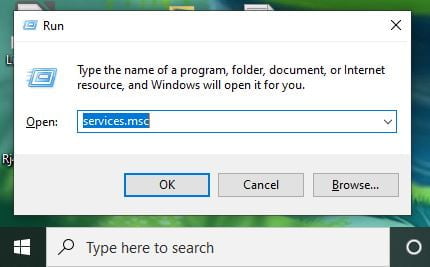
Or, we can also do this by pressing the Windows logo key, and type run, then Run box has come on the screen. In run box type services.msc and click Enter.
Step-2:
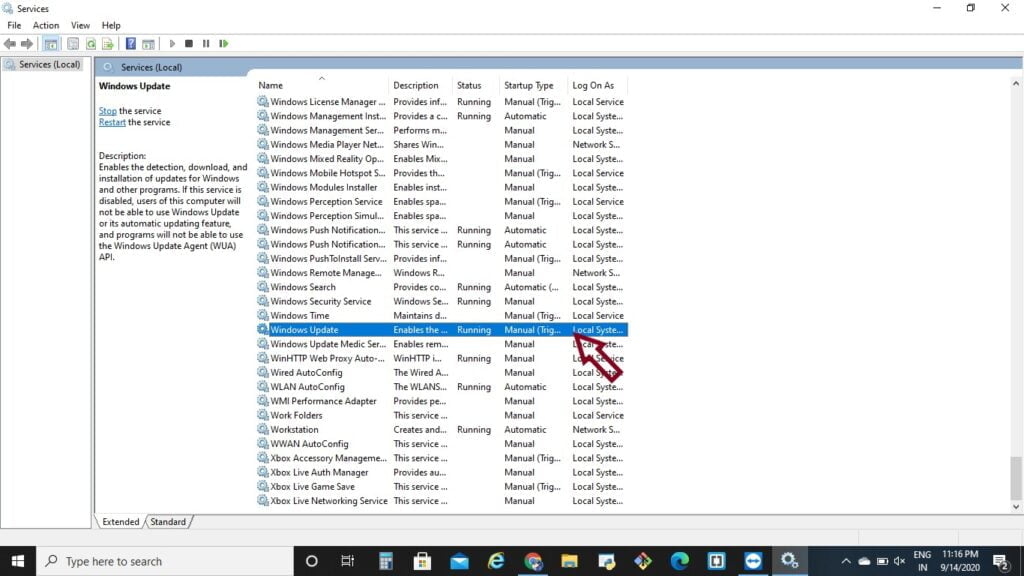
A window is opened. We can see that in the below picture, scroll it down, and you can see that the Windows update option is there. We have to do right-click on it.
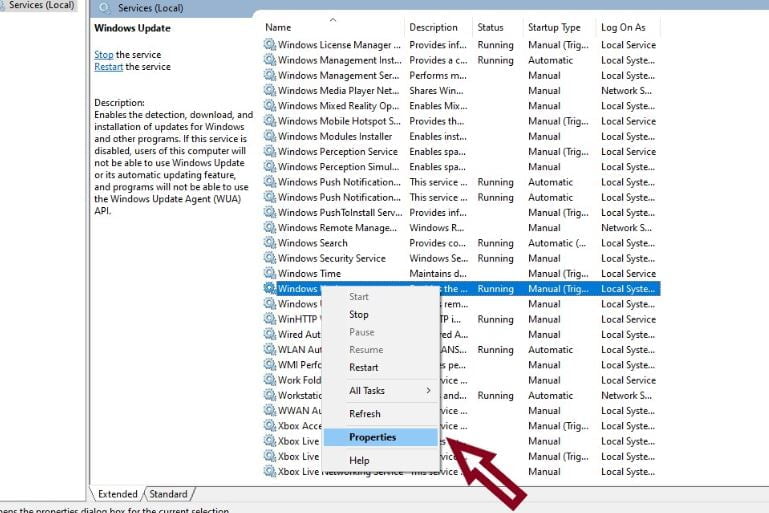
We can see that an option box has appeared on the screen, where many options are there like Start, Stop, Properties, etc. Now click on the Properties option.
Step-3:
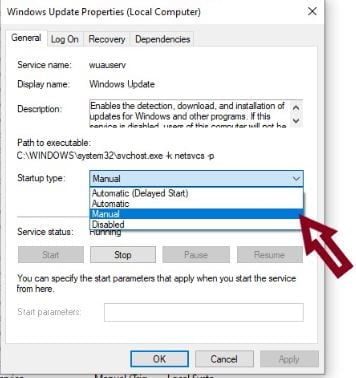
When we opened the Properties option, a Windows Update Properties (Local Computer) box has appeared. There is a Startup type drop-down, then select the “Disabled” option.
Step-4:
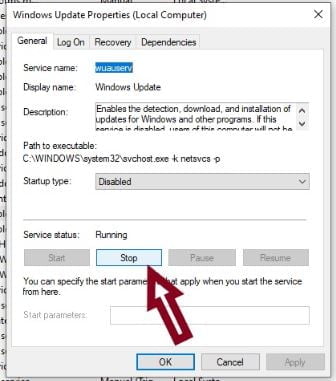
We can see that after choosing the disabled option, all the options are disabled, only the stop option is enabled.
After all of these actions, we have to click the stop button for disabling the update. Then click on the ok button and save the settings.
Another way to stop the Auto-Update in Windows 10
There is another way to stop the auto-update. We can also choose the manual option for disabling the update.
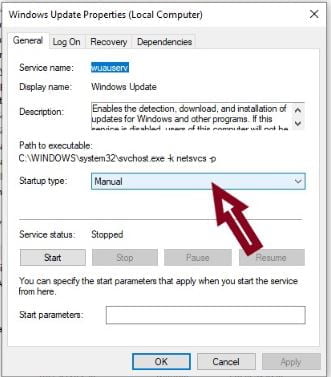
Only one difference is here that in manual type, we can again start the update through the start button. Actually, if we choose the disabled option only, it blocked all the buttons, and we are unable to start it again. But in the Manual option, we can start it again.
FAQs:
What is the main difference between the Clone and Update?
In clone, we can copy the whole thing, and in the update, we can only add or edit the thing.
How to boost performance of windows?
There are few steps through which we can boost our system:
1. Clear temp and %temp%(C:\Windows\Temp)
2. Prefetch
3. Recent tab
4. Stop the background application in Task Manager.
How to boot timing?
Disable some startup application through task manager.
How to Activate the Tablet Mode in Windows 10?
At first, we have to Open the Start Menu and select “Settings” then go to the “System” option. After this, you will find the Tablet Mode switch where you can turn the“Off” to “On”.
What is the difference between 32- bit and 64-bit system?
The version 32-bit and 64-bit refer to how a computer’s processor (CPU) handles the information. The 64-bit version of the system is handled large amounts of RAM more effectively way than the 32-bit system.
In that article, we have a talk about how to stop auto-update in Windows 10 and some important FAQs (frequently asked questions) on windows and computer-related topics.
Please also read the previous tutorials on Web Development and Oracle PL/SQL Tutorial.
Thank You 🙂